The Problem
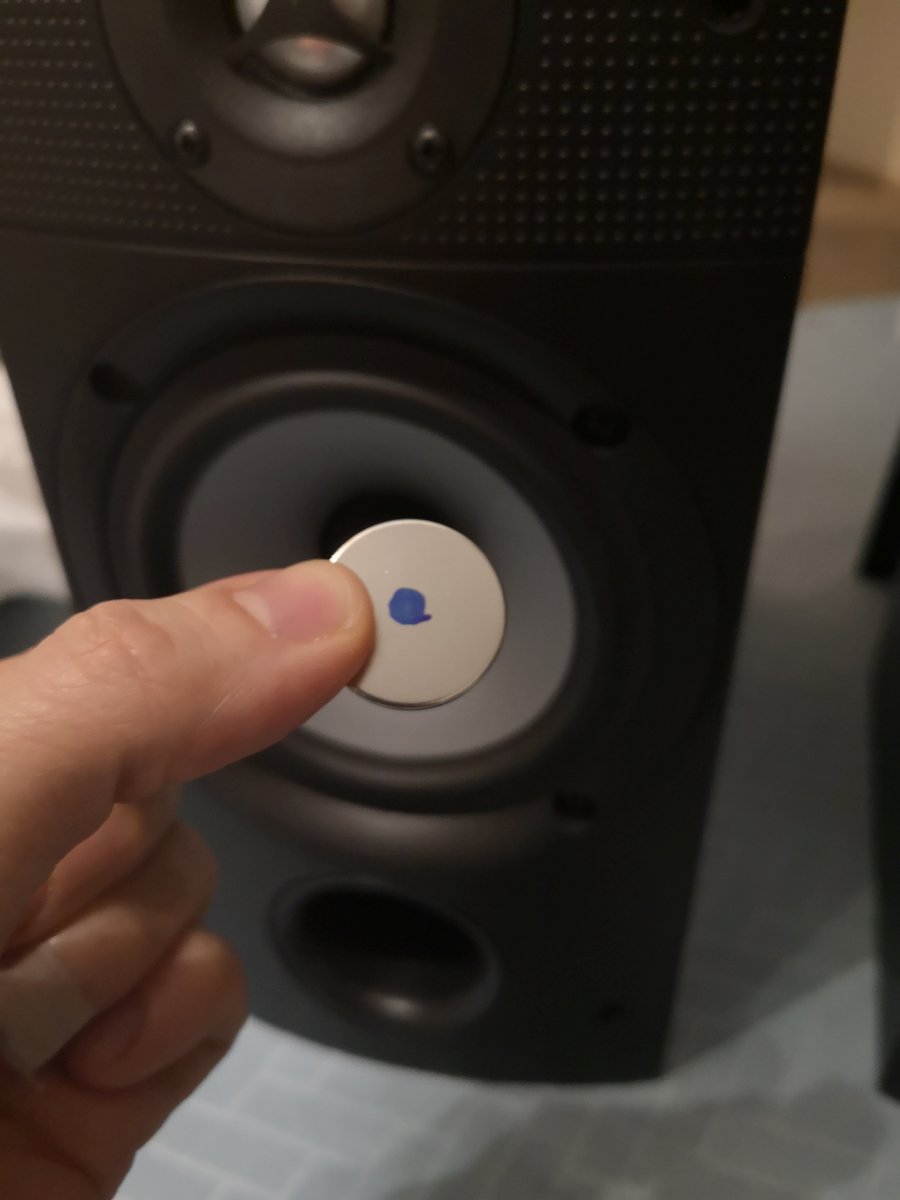
The older PSB Image series (4T, 5T, 1B, T4, T5 etc.) use tweeters that seems to fail after some years, giving a muffled sound. This renders the speaker unusable, as frequencies above 2 kHz get muted by 20 db or more. As replacement tweeters aren’t available replacing with original tweeters is not an option. You can find recommendations to replace the tweeter with a different brand that physically fits, but I would not recommend doing so. The sensitivity (dB/W@1m) is very different, and they have a resonant frequency within the frequency spectrum were they operate. I did try some of these tweeters at first, but after doing measurements on the impedance (using REW) they did not seem to be a good match for the bandpass filter either. Sadly, this being a while ago I cannot find the data anymore so you will have to take my word for it. Sure, they will give you sound, but not as the speakers were originally made, and not a flat response as they should.
And besides, there is a cheaper, better way which to repair the original tweeters, returning the speakers to their original sound. This also means that you can pick up cheap broken PSB Image series speakers, and repair them for cheap. The reason why the tweeters fail (at least the 4 I have repaired) is that the nickel layer on the magnets falls of the magnet, and the magnet then starts to disintegrate, turning the ferromagnetic fluid to thick goo. What makes this process happen in the first place though, I have no idea. Bad manufacturing, bad magnets or maybe heat? No clue.
For the method below you’ll need parts for about 10-20 USD and 60-90 minutes for two speakers.
What’s needed
- 1 pc (per speaker) Neodymium magnet (Ø 25mm x 3mm thick), I bought these in Norway but aliexpress/whatever would probably do
- 0.1ml (per speaker) ferromagnetic fluid for tweeters (partsexpress or ebay, I bought a 0.5ml syringe on ebay, enough for 4-5)
- 1 pc M4x20 bolt, if it’s a thumbscrew even better
- 1 bottle of superglue (I used cyanoacrylate from locktite)
- Acetone for cleaning
- Philips #1 screwdriver
- Some flat screwdrivers, smallish
- Knife (snap blade type)
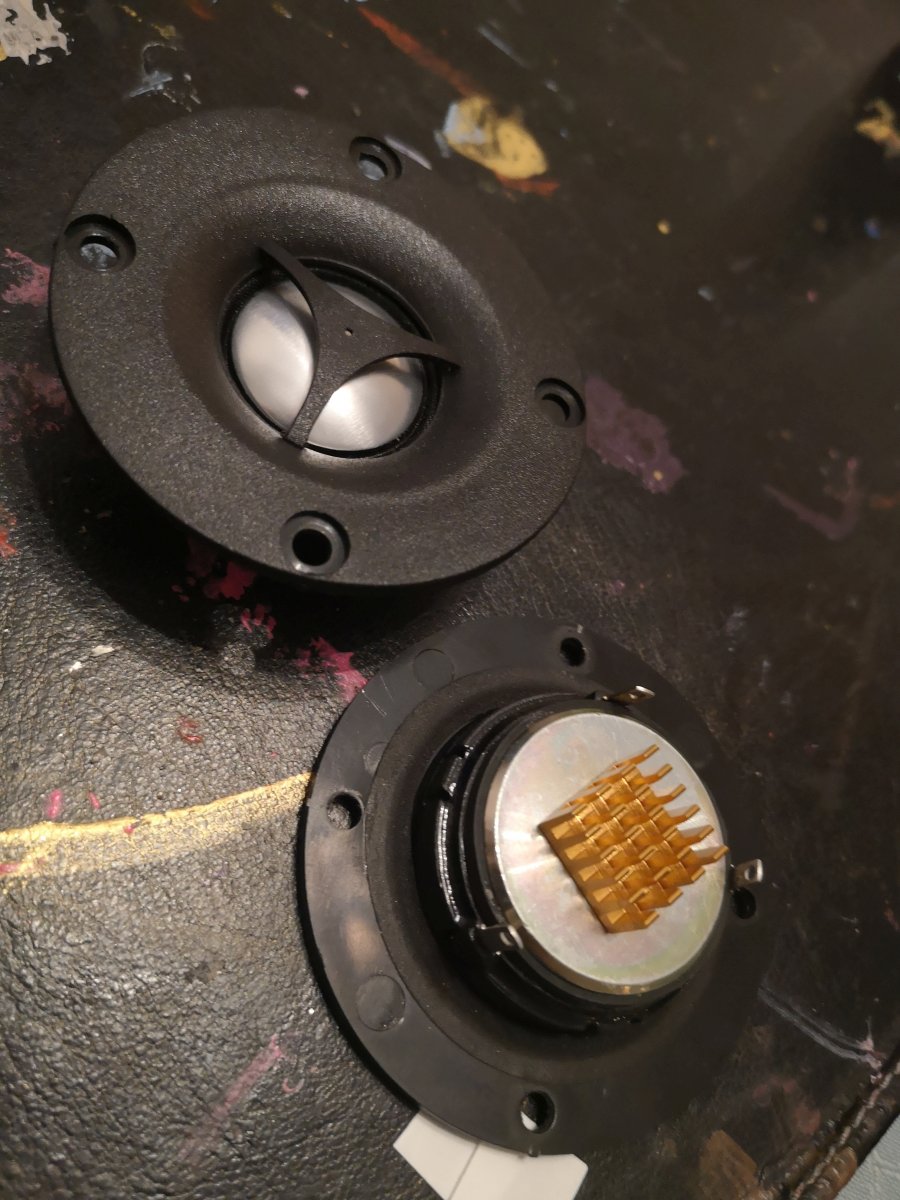
- 1 pc 3D-printed alignment tool, needs to be VERY precisely printed.
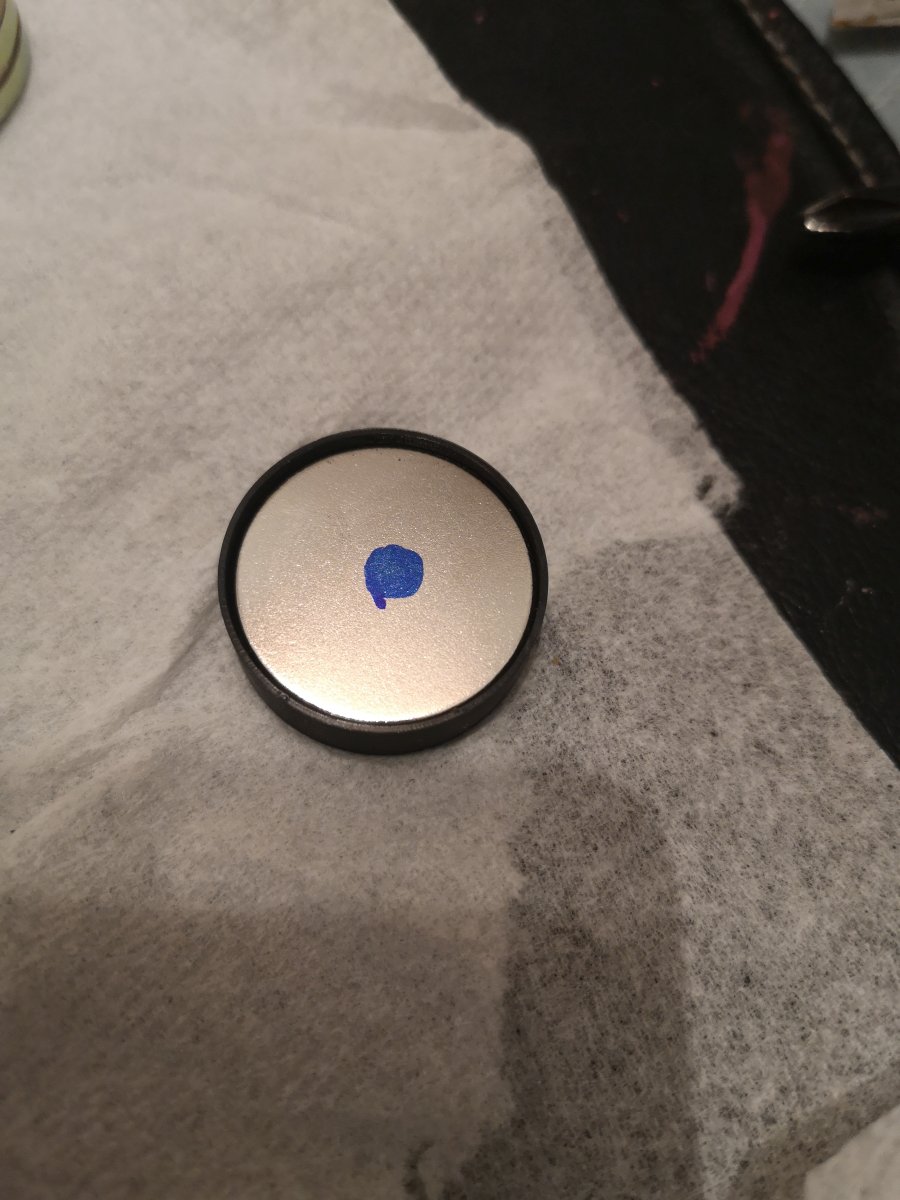
- Permanent marker
- 1 pc (per speaker) 15x15mm heatsink (optional)
3D print
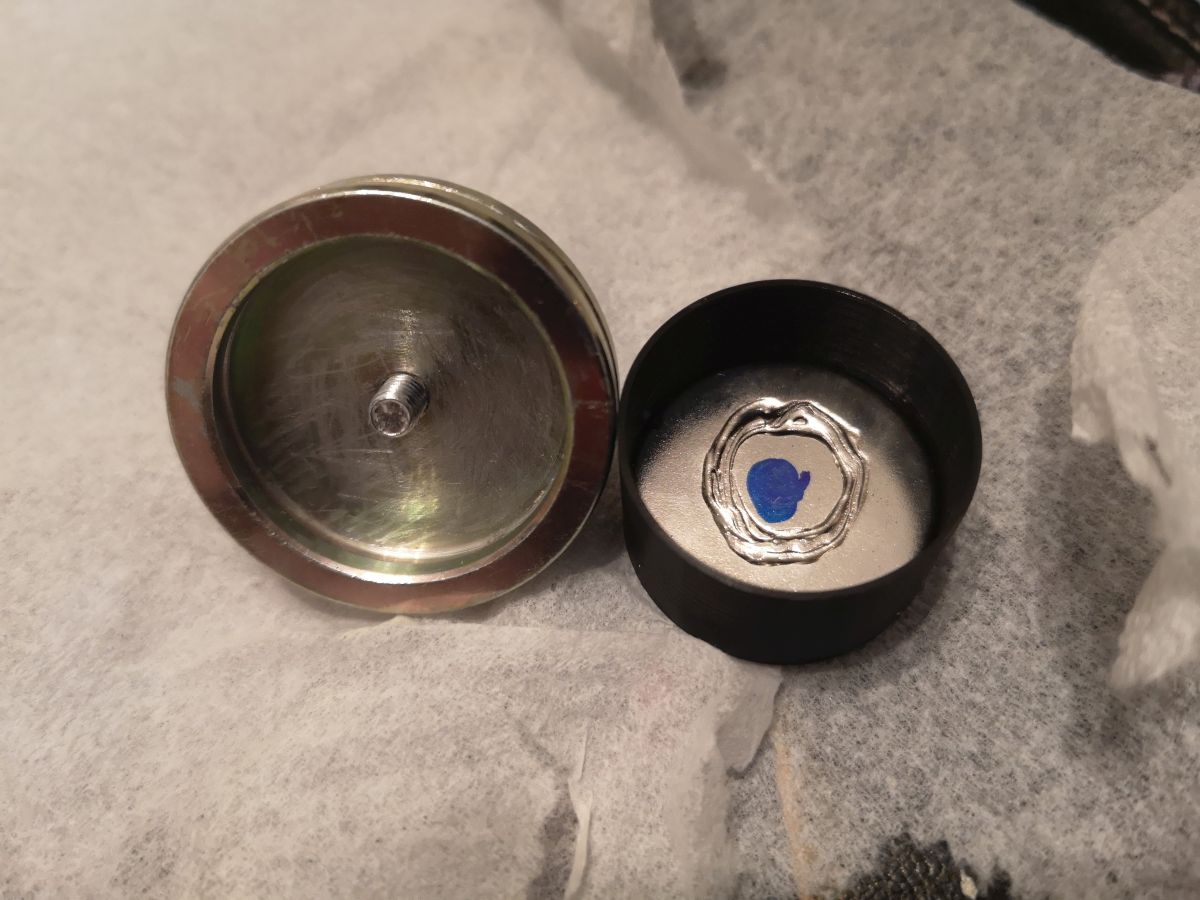
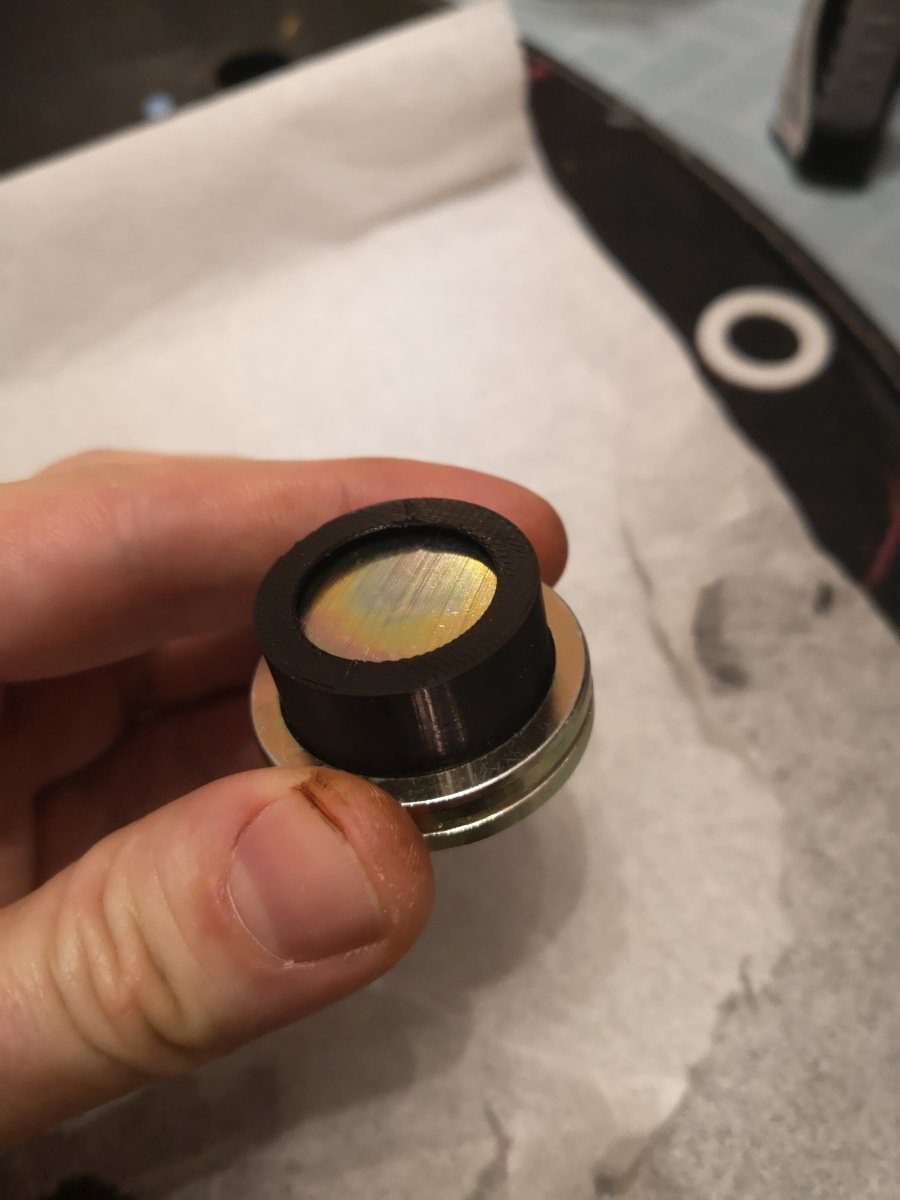
The 3d printed tool is needed to align the magnet to the metal cup, as well as to the metal disc. If using a different glue you might be able to do this manually after they are in place, but I can’t guarantee that’ll work. With cyanoacrylate you get ONE chance, as the glue will dry instantly due to the strong pressure created by attraction between the magnet and the metal. If alignment is off, you will have to redo and most likely destroy the magnet in the process. Find someone with a printer, and bring your disassembled and cleaned parts to ensure a snug fit. Print, and print again while tuning the print settings to ensure that it’ll fit.
Magnet polarity

Dismantling

3) Use a Philips #1 screwdriver for the screws, use your other hand to shield the tweeter and woofer, in case the screwdriver slips. You do not want it poking through your speakers. They will be tight at first, so be careful not to strip the screws.
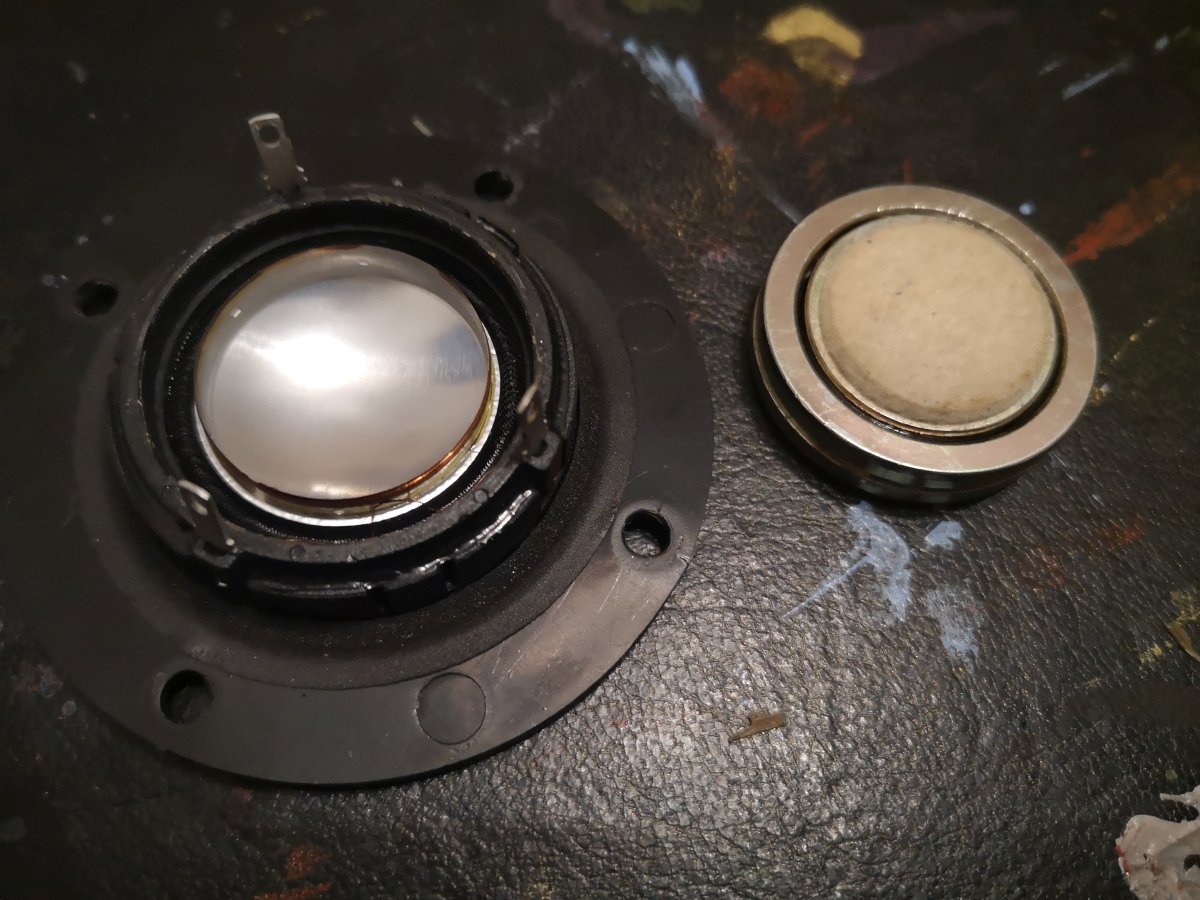
5) Voila! Remove old glue from the edges so it doesn’t fall into the tweeter while reassembling
6) Remove this cotton (?) pad before proceeding, so it doesn’t get dirty. The glue isn’t that good so should come of easily with a knife.
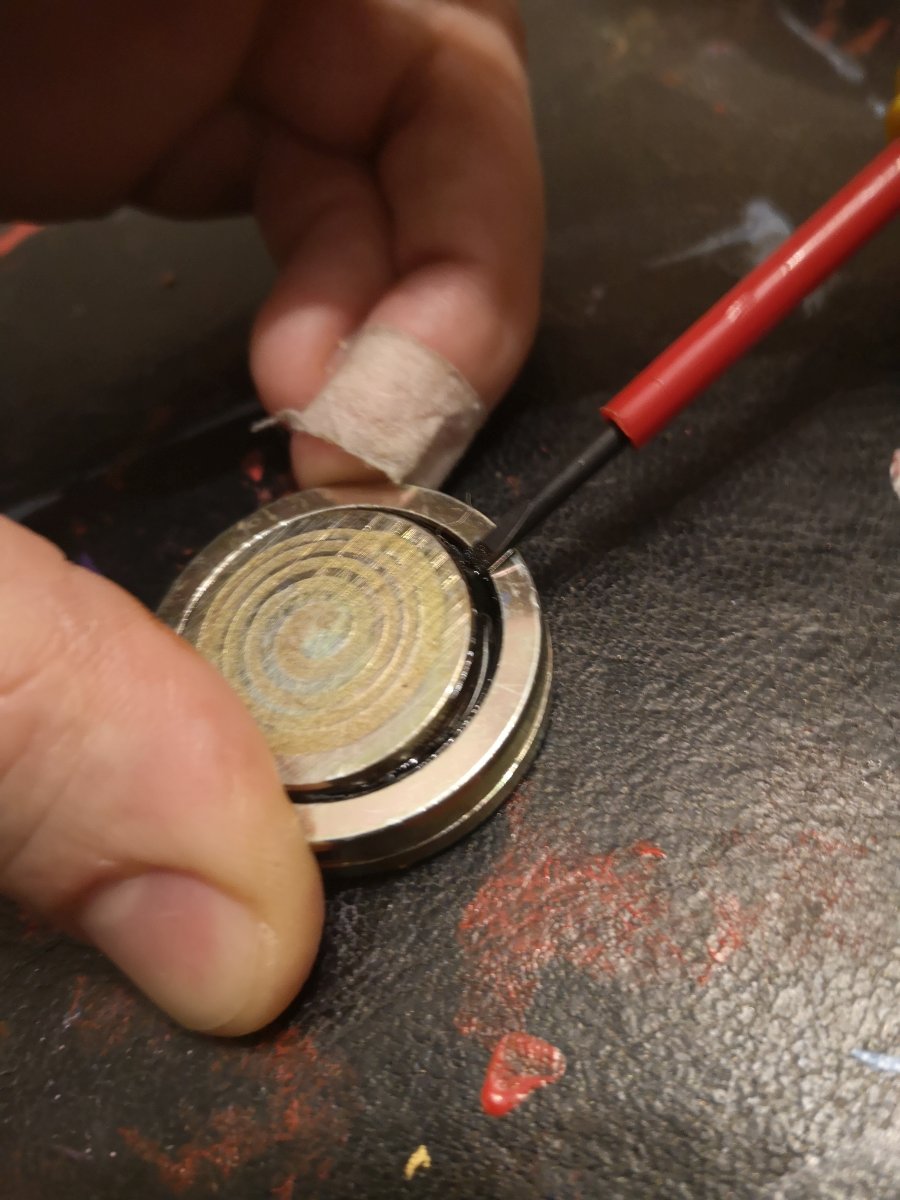
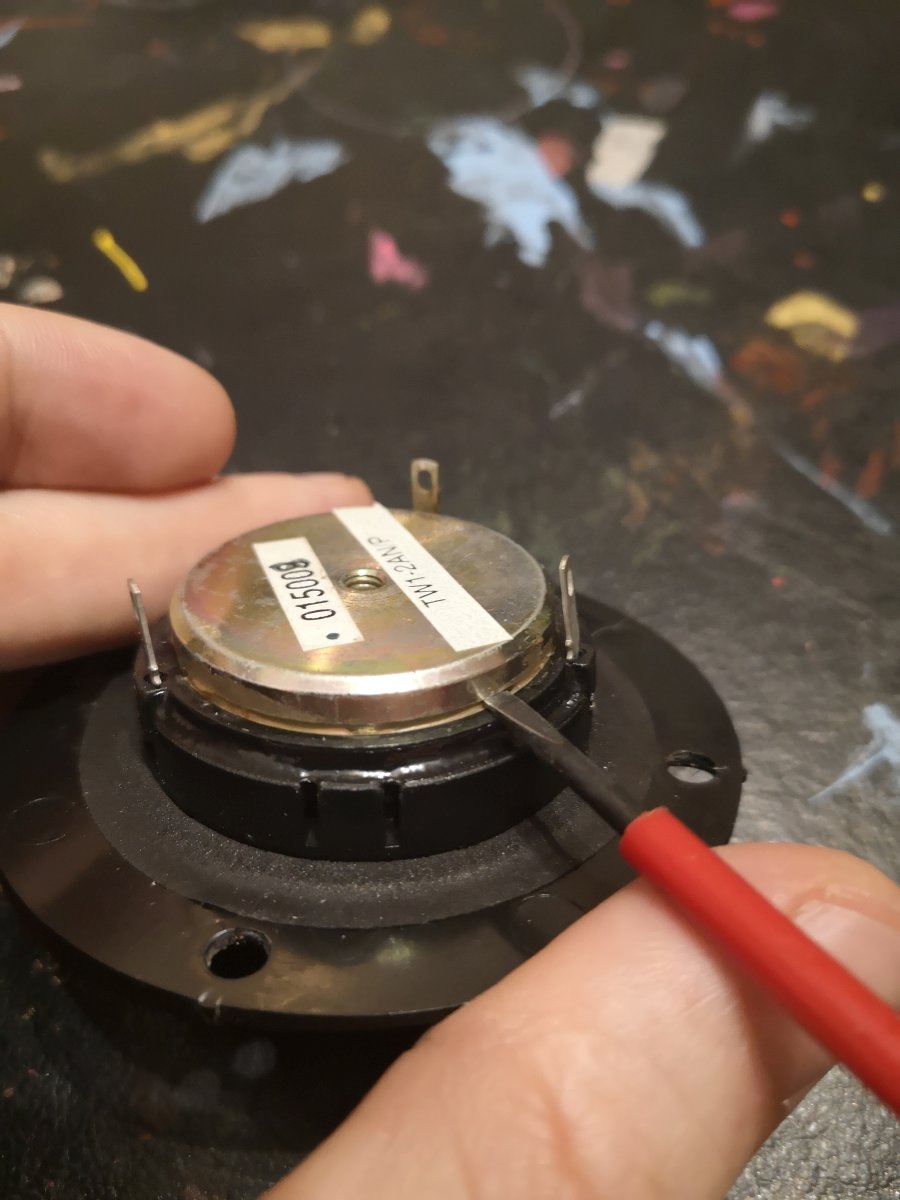
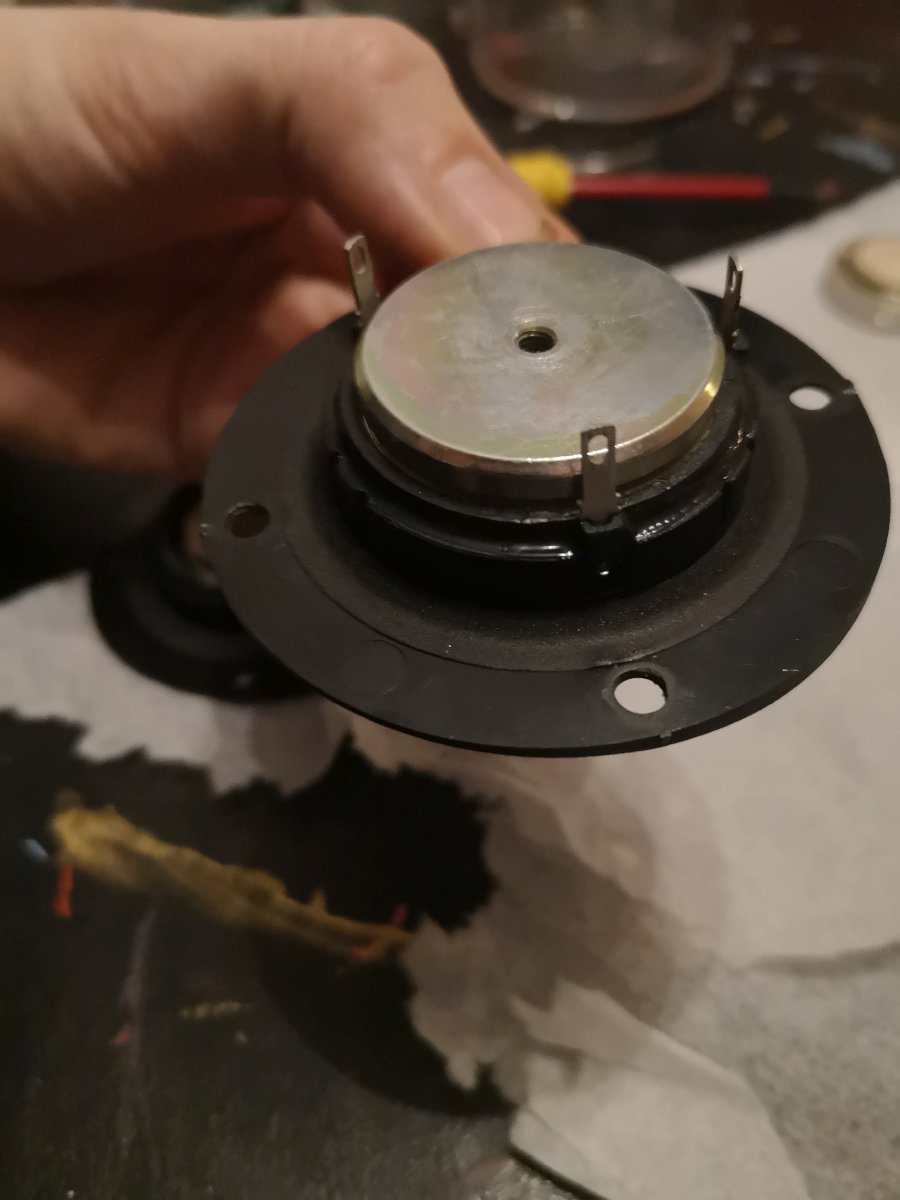
7) Use a screwdriver to wedge up the metal disc. The magnet is under, and we’ll remove that in the next step.

8) This is why your tweeter sounds bad, a partially disintegrated magnet. Continue to remove the magnet with the screwdriver in the same way. If it seems stuck, a sideways twist to get it unstuck should work. Throw away the old magnet.
Cleaning
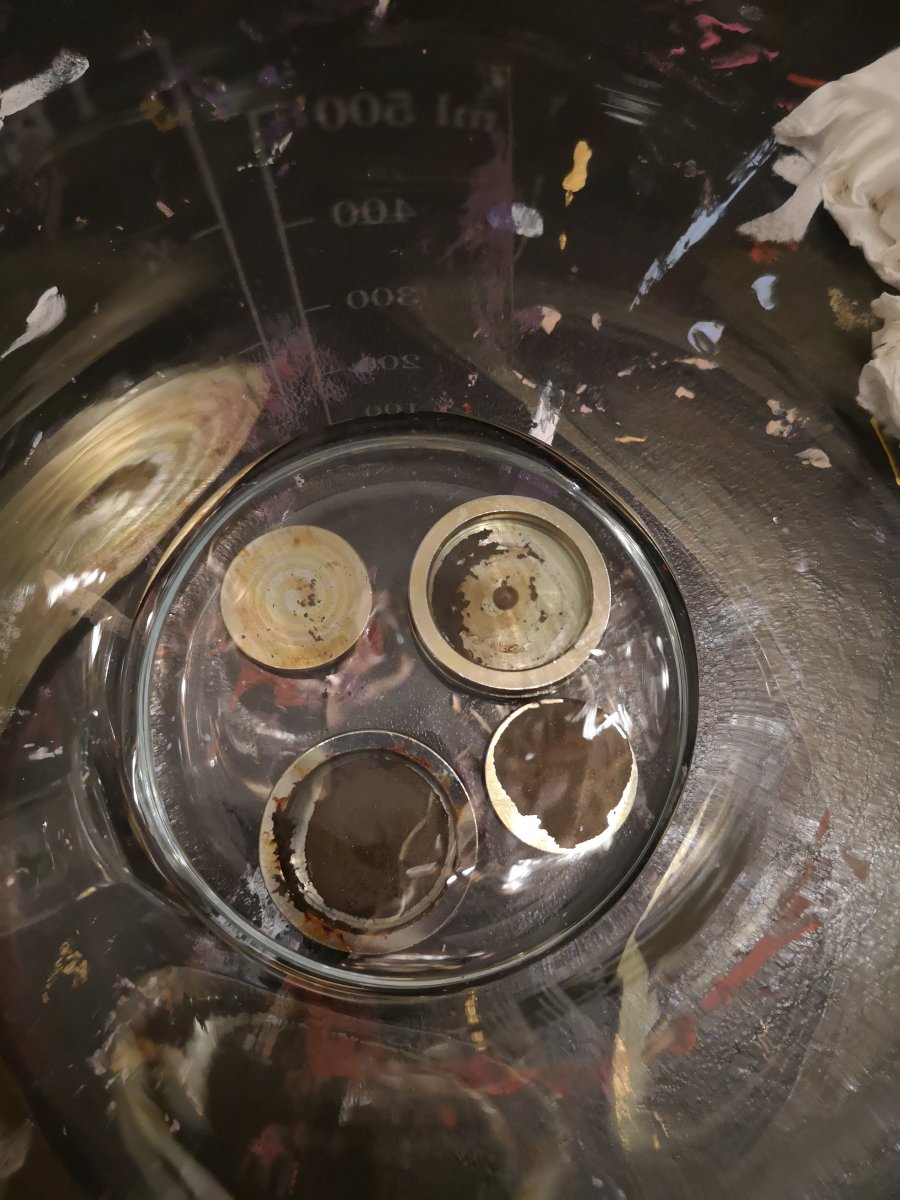
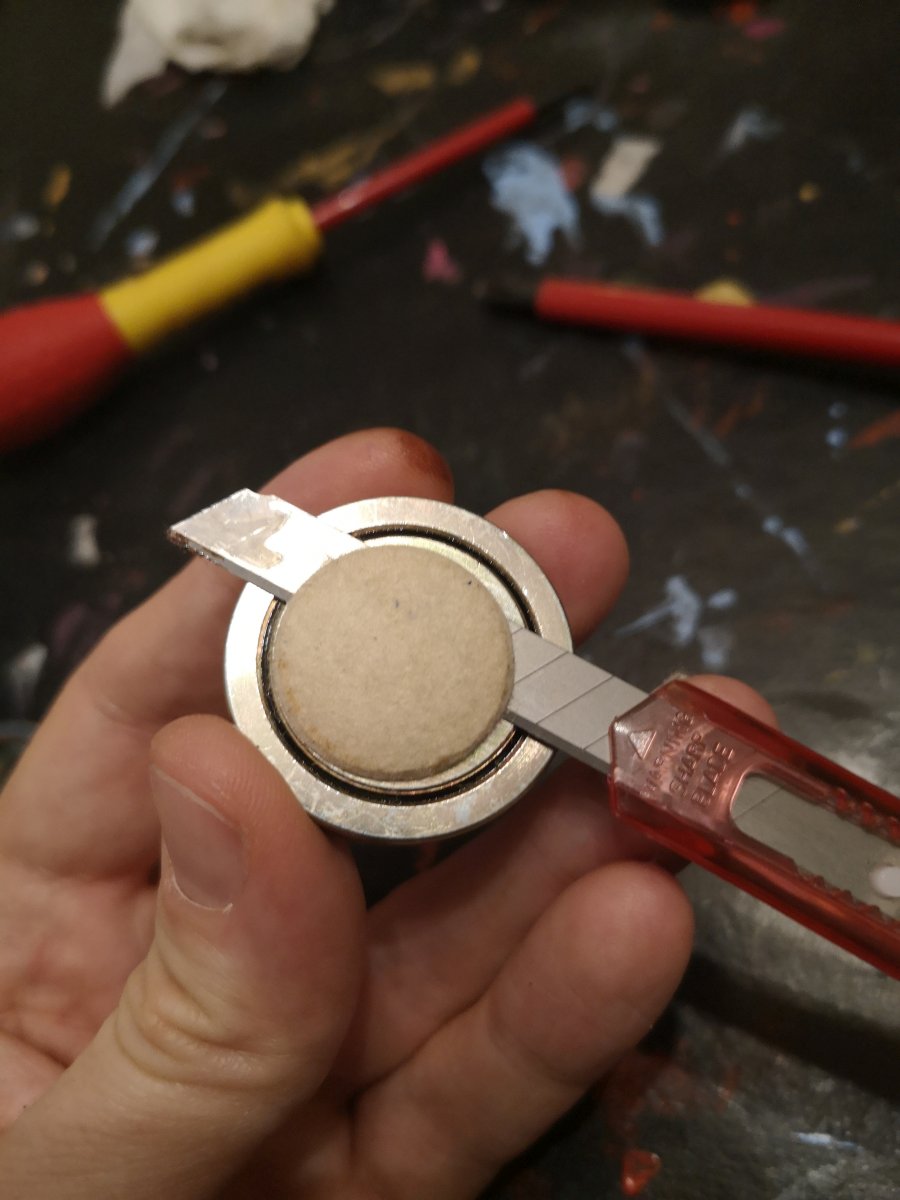
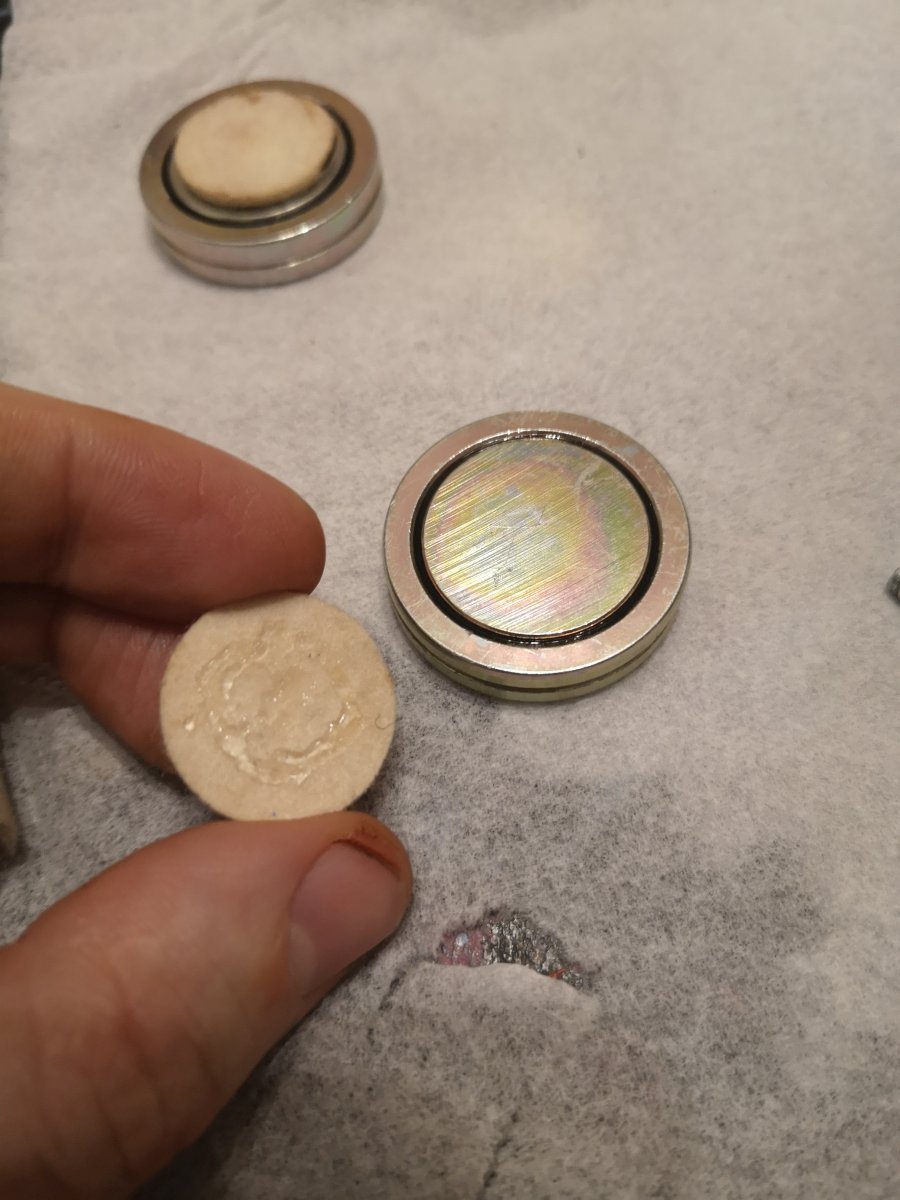
9) Pour some acetone into a glass container and let it dissolve the glue. What you see is probably the nickel layer that has de-laminated, glued to the metal cub and disc.

10) After a minute or so, try to scrape of some of the nickel/glue residue with a screwdriver. Put back into the acetone and do the next part. Repeat until all parts are clean. Use a paper towel to clean all the parts with acetone, and visually inspect the metal cup to ensure there are no metal or glue fragments left. The screwdriver left some scratches to the metal, but this should matter much.
Mount new magnet
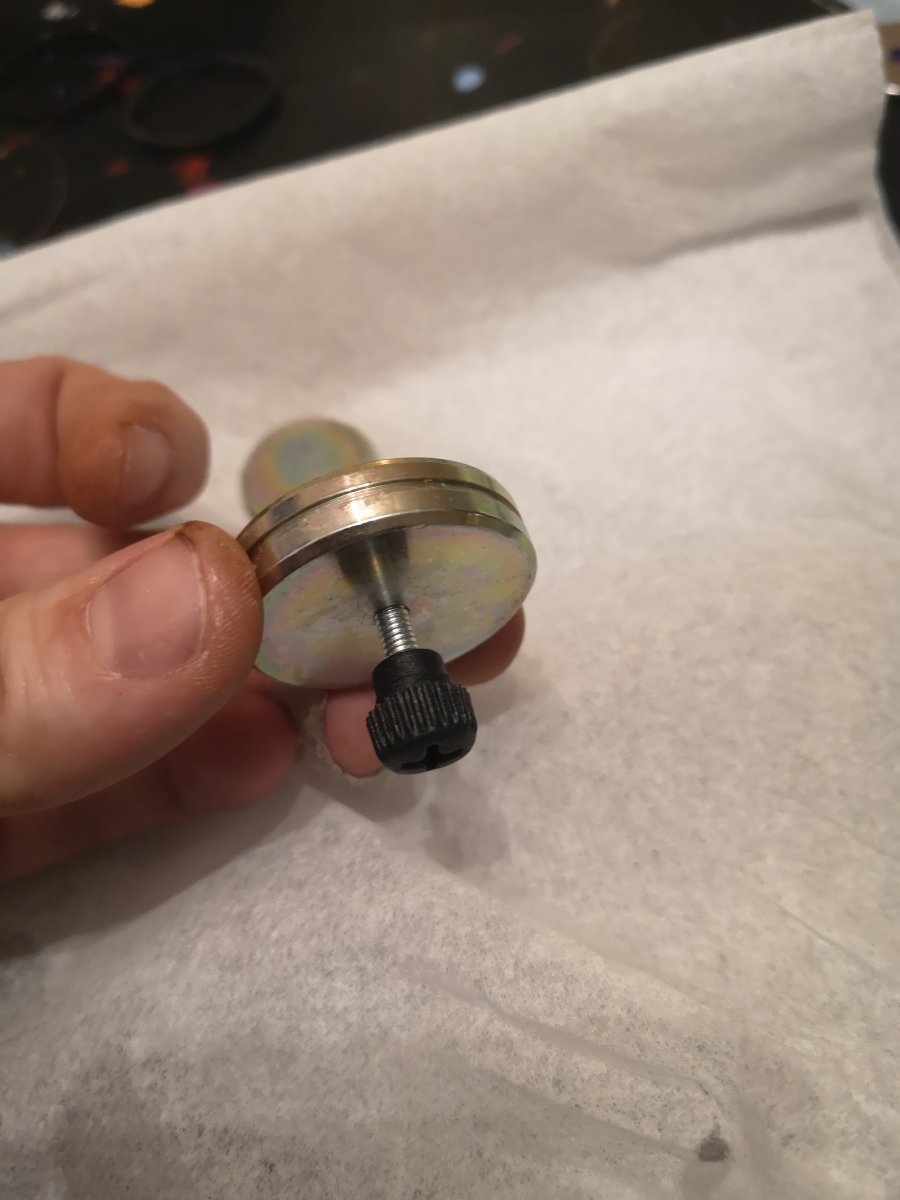

13) Add the magnet by inserting it by its side first, then flipping it down carefully. The marked side should be up! Ensure that the glue holds and that the alignment looks ok.
Refill ferrofluid

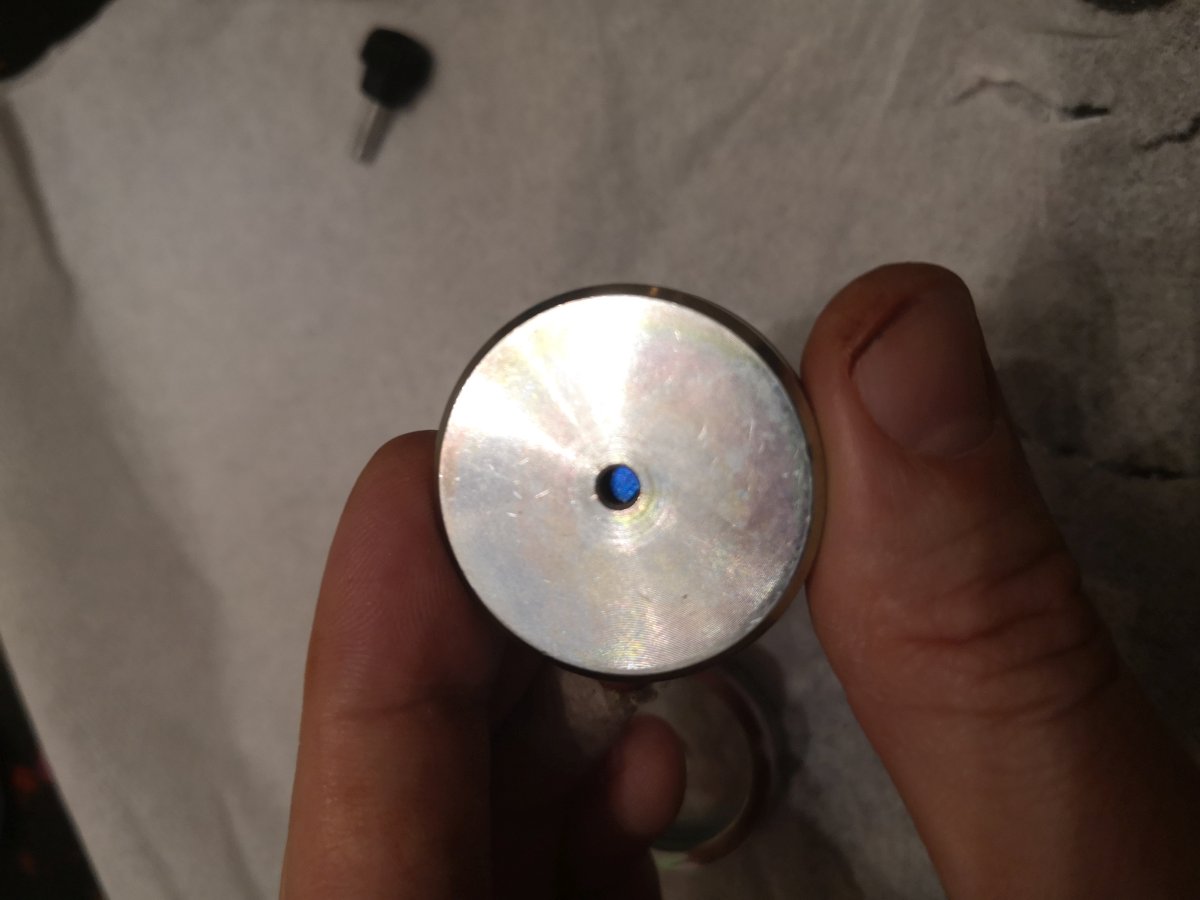
17) Check that the metal disc and magnet are aligned all with a uniform distance all around. It should be hard to get this wrong using the tool. Then get the ferrofluid and slowly start filling.

18) Fill to where the bevel starts on the metal cup, it should 0.1 ml.
Reassemble and final cleaning
19) Glue the cotton pad back on

20) Use a q-tip and some alcohol to carefully clean the inside of the cone for any old residue. On the outside I would be extremely careful, or just drop completely to clean since the wires are very thin, and if you break them it’s game over. Be very very careful in this step. The residue should come of easily. Alternatively, you can probably use some iso-propanol spray so you don’t have to touch any delicate parts.
End results

Results
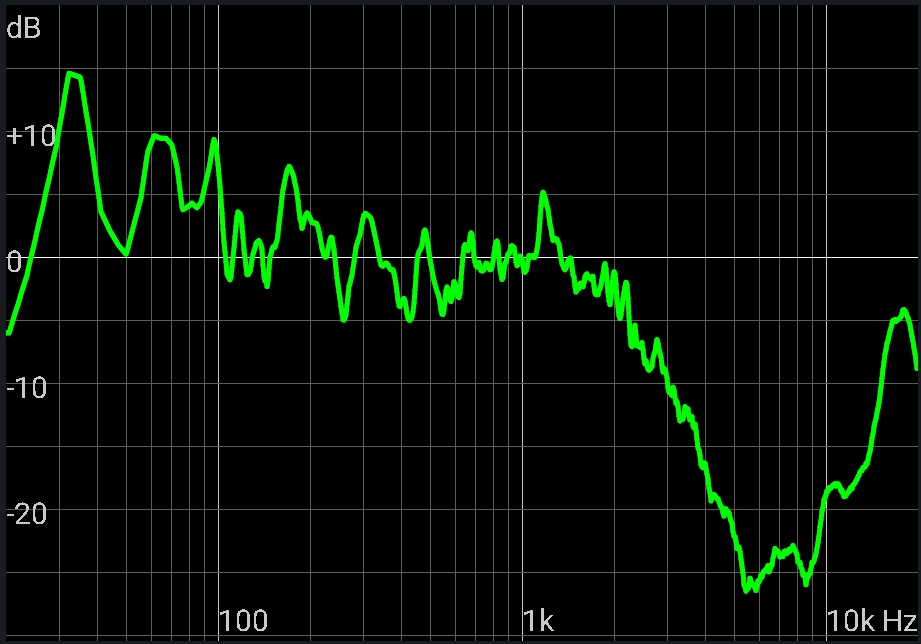
The speakers sound great again, and the measurements below show how the full frequency range has been restored to a more or less flat curve. Since they are not measured in anechoic listening chamber, the spectrum will be affected by early reflections etc. Measurements were done using the MultEq app, running Audyssey XT32 on a Denon X4300H.

Final thoughts
The original strength of the neodymium magnet is not known, so the replacement might be slightly off. Then again, the strength doesn’t vary by that much so I doubt it would have a huge impact. Either way, it should be much closer to the original sound than any third party replacement tweeter, at a fraction of the cost. Given the low cost and time needed for this fix, I do not see any reason not to try. It also feels good to repair stuff, and it’s good for the environment 🙂
Cheers 🙂